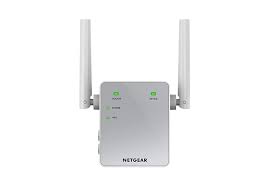
Dead zones and weak connections can be a constant source of annoyance. The installation of a Netgear extender fortunately offers a means to increase the speed and coverage of your wireless network. You can set up Netgear Extender with the help of mywifiext in an easy way. No matter if you want to extend your Wi-Fi coverage to remote areas of your home or get rid of pesky dead spots, this article will walk you through the fundamental setup procedures for a Netgear Wi-Fi extender and ensure a flawless and rapid internet connection throughout your area.
Setup Instructions for a Netgear WiFi Extender
Just follow the directions to set up Netgear Extender:
- Wait for the extension to turn on after connecting it to an outlet.
- You may check the status of the extension by looking at its LED lights.
- Make your way to the Wi-Fi settings on your computer or mobile device.
- Select the network with the name Netgear_EXT to connect to the extender.
- Enter “mywifiext.net” or “192.168.1.250” in your browser to connect to WiFi.
- Utilize the default login credentials listed in the extender’s manual or on the hardware.
- You should configure your Netgear extender by following the on-screen directions.
- The extension will then establish a connection with your router after that.
Place your Netgear extender correctly, and ensure that the LEDs indicate a solid connection there.Return to the setup page and complete any outstanding steps. Log out after you’ve saved your changes.
Congratulations! The set up Netgear Extender has now been completely.
Netgear Extender WPS Setup
The WPS (Wi-Fi Protected Setup) configuration of the Netgear Extender is a quick and simple solution to increase your Wi-Fi coverage without having to go through time-consuming set up Netgear Extender procedures.
Of course, the following steps could be used to set up Netgear Extender using WPS:
- Wait for it to switch on after plugging the extension into an outlet.
- Look for the WPS button on the front or side of your Netgear Extender.
- Press and hold the WPS button on the extension for roughly 2 seconds.
- There will be a flashing of the WPS LED light.
- The extender and router LEDs will stabilize after the procedure is complete.
- If dead zones continue, think about moving the extension to increase coverage.
You have successfully installed the Netgear Extender using the WPS procedure, enhancing Wi-Fi coverage in your neighborhood.
Netgear WiFi extender firmware update
Here’s an efficient and original method for upgrading the firmware on your Netgear Extender:
- To get started, ensure that your mobile device or computer is connected to the extender’s Wi-Fi network.
- Next, log in with the default credentials after entering the IP address of the Netgear WiFi Extender.
- Please enter your extender’s username and password.
- Visit the “Maintenance” or “Firmware Update” section of the web interface.
- If there is a firmware update, download it and install it in line with the directions shown on the screen.
- The extender will automatically reboot after the update to take effect.
The most recent features and security updates are now on your Netgear Extender thanks to the successful firmware upgrade.
Solutions to issues with set up Netgear Extender
It’s critical to effectively resolve Netgear WiFi Extender problems. Typically, issues like poor connectivity, sluggish speeds, or dropped signals are usually simple to fix. The diagnostic issues listed below are followed by their solutions:
- Make that the extension is plugged in and has access to power.
- Move the extension towards the router for a stronger signal.
- LEDs that are flickering or not working could be signs of a problem, so take care to pay attention to them.
- To ensure a successful connection, verify that your device is connected to the extender’s Wi-Fi network. Additionally, you may need to update the firmware on your extender and router to address connectivity issues.